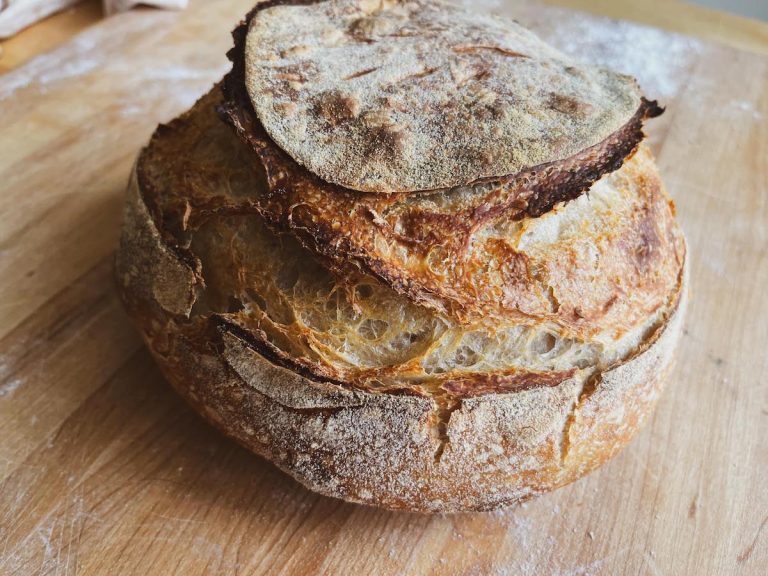
How to Make a Sourdough Starter
This article is all about how to make a sourdough starter from scratch! There’s something magical about the process of making sourdough bread at home. The combination of flour, water, and wild yeast creates a living ecosystem that transforms your kitchen into a mini-bakery. The first step in your sourdough journey is to obtain your own sourdough starter. This can be done by receiving a starter from someone else or by creating your own. In this guide, I’ll walk you through the process of cultivating your own sourdough starter from scratch.

This post contains affiliate links, which means I may earn a commission from qualifying purchases at no extra cost to you. See my full disclosure here.
Ingredients
- Flour: Whole wheat or rye flour is ideal for starting your sourdough journey due to its higher nutrient content and natural yeast presence. You can also use all purpose flour to make your starter, though it may take longer to get the starter going. You can also do a combination of flours, which is what I suggest in this guide.
- Water: Use filtered or dechlorinated water to avoid any interference with the natural fermentation process. I use a berkey filter system, but if you have reverse osmosis in your home, that should work. If not, get some filtered water from your grocery store.
Equipment
- Kitchen Scale
- Glass jar
- Wooden spatula (you can also use silicone here, but stay away from metal)
- Rubberband (I just pull them off of my market veggies)
Day 1 | Create the Initial Mixture
Ingredients:
- 50 grams flour
- 50 grams filtered water
Instructions:
- In a glass container, mix the flour and water until well combined. The consistency should resemble a thick pancake batter.
- Cover the container loosely with a cloth to allow air circulation. I prefer using a mason jar or weck jar and setting the lid on top. You want to capture yeast from the air, so if it’s airtight, that process won’t happen. The lid is primarily to keep dust and other particles out of the starter.
Note: you will want the temperature of the starter close to 75-80 degrees if possible. In the summer, this usually isn’t a big deal, but in the winter can be challenging. I usually put my starter in a turned off oven with the light on. That environment produces just enough heat to keep the starter at a good temperature while fermenting. A word to the wise, leave a note on your oven so that it doesn’t accidentally get turned on by you or other members of your household!
Days 2-7 | Daily Feedings
Ingredients:
- 25 grams of the existing mixture from the previous day
- 25 grams flour
- 25 grams water
Instructions:
- Each day, discard half of the existing mixture and add more of flour and water using a 1:1:1 ratio in weight
- Stir the mixture well, ensuring there are no dry flour pockets.
- Cover the container and let it sit at room temperature.
- Ideally, feed once in the morning and once in the evening for best results. If you skip a feeding, that’s ok, but you will decelerate progress if you leave it without feedings for too long (it gets hungry!)
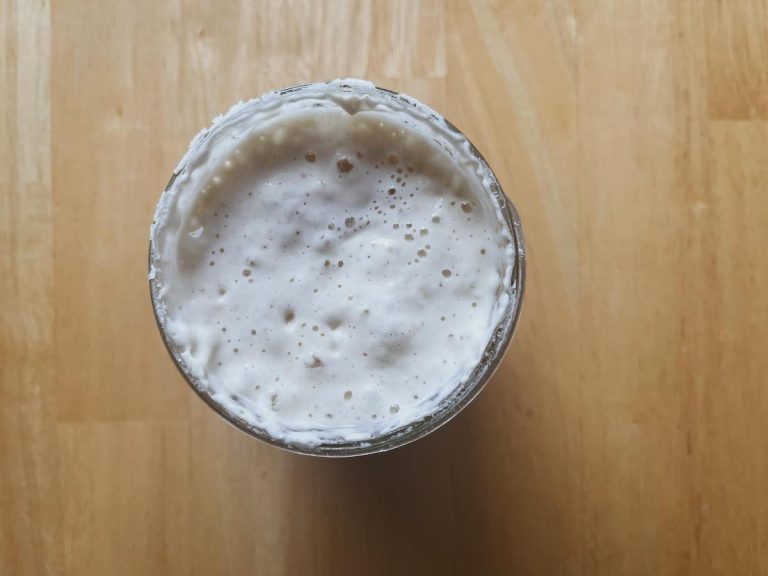
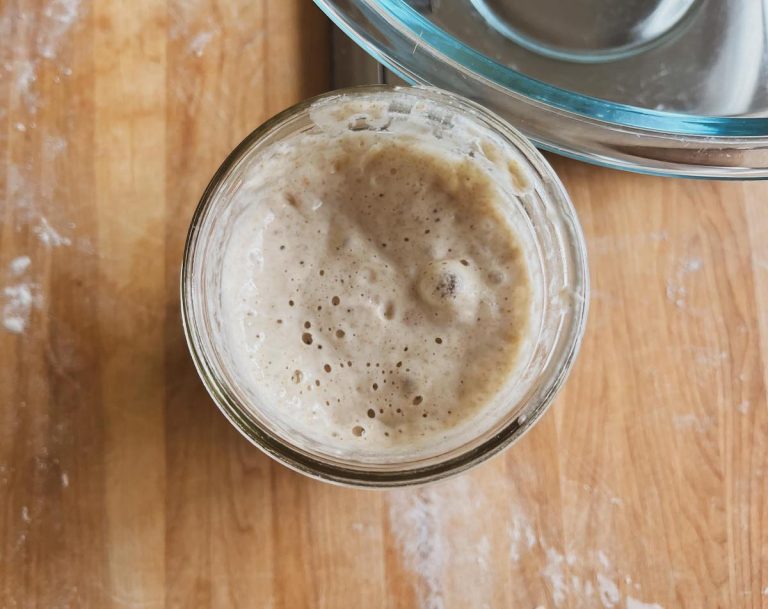
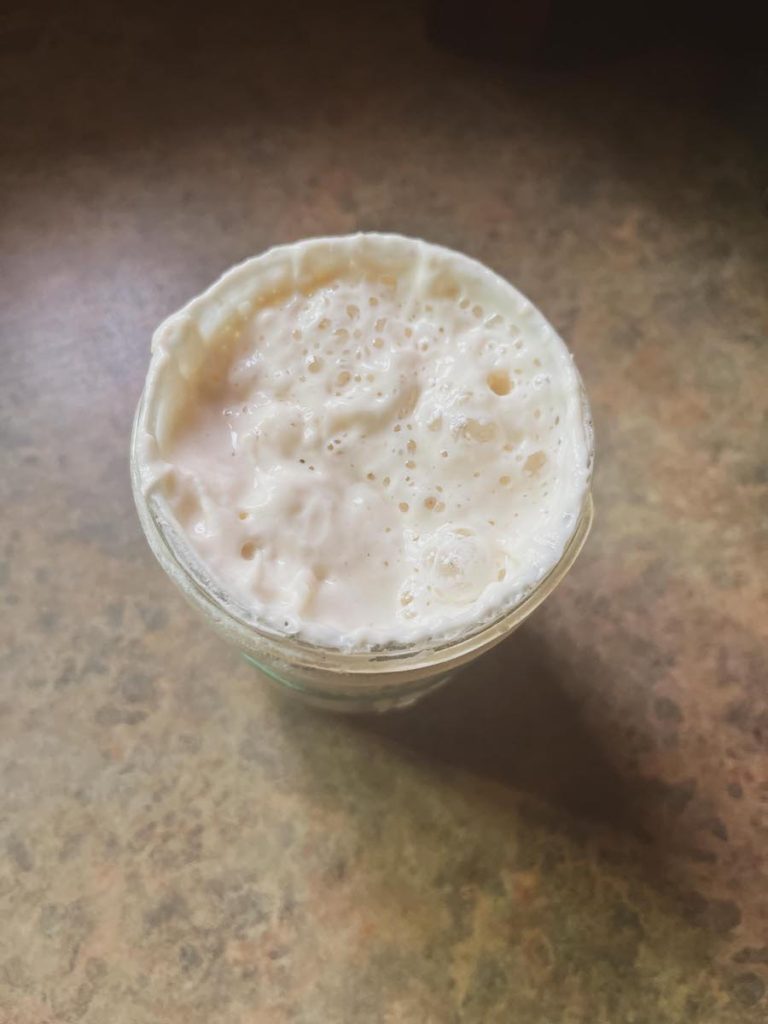
Signs of Sourdough Fermentation
As you progress through the daily feedings, you’ll start to notice changes in your mixture:
- Bubbling: The starter will develop small bubbles, indicating that wild yeast is becoming active.
- Rise and Fall: The mixture will rise after feedings and then gradually fall as the wild yeast consumes the flour.
- Sour Aroma: The starter will develop a pleasant, slightly tangy smell.
By the end of the first week, your sourdough starter should be ready to use. If it isn’t, keep going, this process could take up to 3 weeks. If you haven’t done a lot of baking with yeast before, your kitchen maybe take longer to capture the wild yeasts, as they are scarce. The more you feed your starter, the more yeast activity you create, so keep going, even if it takes longer than you anticipated. If you are getting antsy, try feeding it primarily rye flour to speed up the process.

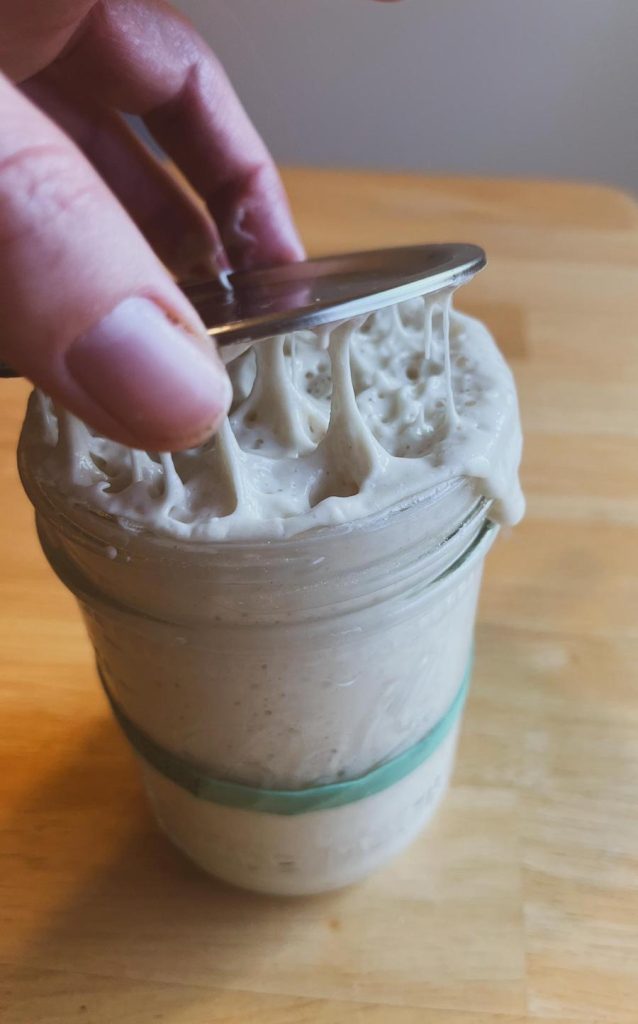
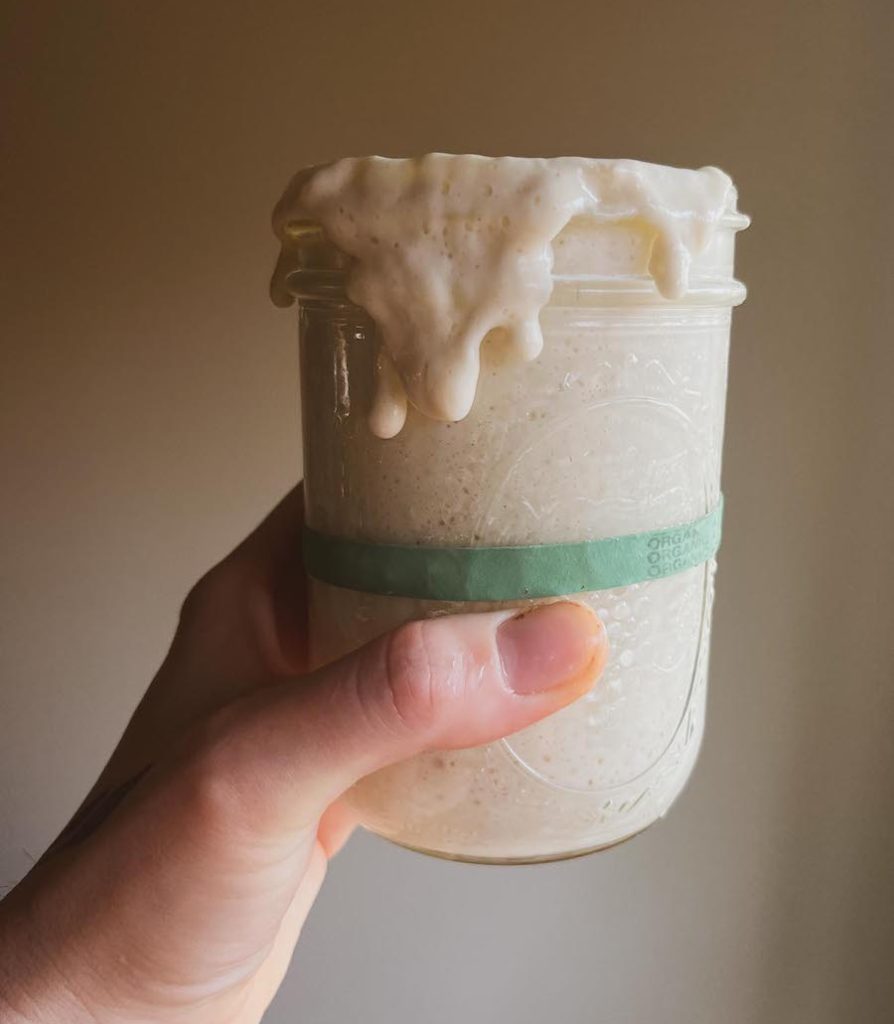
How To Tell If My Sourdough Starter is Ready
Following the signs of fermentation above is a great way to know that the process is working. Once you have seen your starter rise to double after feedings, consistently, it should be ready to use. You can also do the float test to see if it floats in water. If it does, it’s good to go. Just scoop out a bit of starter and put it in a glass on water to test.
How to Maintain Your Sourdough Starter
Once your sourdough starter is ready for baking, continue the daily feedings for a more stable and robust starter. If you’re not planning to bake every day, you can refrigerate the starter (airtight) and feed it once a week or so (try to feed it at least twice per month). If you bake regularly, just leave it on the counter and feed it once per day. I once left mine on the counter without feeding for several days and it got extremely sour (smelled like alcohol) and very weak. I had to feed it rye flour consistently for a few days to get it back on track.

Tips and Troubleshooting
- Patience is Key: Sourdough starters thrive on consistency. Be patient, and don’t be discouraged if progress seems slow initially.
- Room Temperature Matters: Keep your starter at a consistent room temperature, ideally between 70-75°F (21-24°C). When feeding, to speed up the activation process, try for around 75°F or slightly higher.
- Adapt to Your Environment: Flour, water, and air quality can vary. Adjust the feeding ratio if needed.
- Use Responsibly: When baking, always reserve a portion of your starter for future use and never use the entire batch or you’d have to start over.
Zero Waste
Sourdough is one of the best zero waste, highly nutritious, traditional foods that you can invite into your kitchen. The discard can be used for many different recipes, so nothing goes to waste. Always use reusable everything.
For sourcing flour, be sure you’re getting it in paper bags or bags that can be reused. When you start getting the hang of it, milling your own flour is the best way to reduce waste and preserve as many nutrients as possible!
Your water source should be filtered, which means you may have to get some spring water from the grocery store. Many larger grocers offer a refillable faucet, which would be the better way to go here. I use a Berkey water filter. Reverse osmosis is also a great option.
Check out these recipes


How to Make a Sourdough Starter
Equipment
- 1 Weck Jar
Ingredients
- 200 grams flour
- 200 grams filtered water
Instructions
- In a glass container, mix the flour and water until well combined. The consistency should resemble a thick pancake batter.
- Cover the container loosely with a cloth to allow air circulation. I prefer using a mason jar or weck jar and setting the lid on top. You want to capture yeast from the air, so if it’s airtight, that process won’t happen. The lid is primarily to keep dust and other particles out of the starter.
- Each day, discard half of the existing mixture and add more of flour and water using a 1:1:1 ratio in weight. I usually do 25 grams of each.
- Stir the mixture well, ensuring there are no dry flour pockets.
- Cover the container and let it sit at room temperature.
- Ideally, feed once in the morning and once in the evening for best results. If you skip a feeding, that’s ok, but you will decelerate progress if you leave it without feedings for too long (it gets hungry!)
- Once you have seen your starter rise to double after feedings, consistently, it should be ready to use. You can also do the float test to see if it floats in water. If it does, it’s good to go. Just scoop out a bit of starter and put it in a glass on water to test.